3D Prints and Progress: ASA Test Print Issues
- Feb 17, 2024
- 5 min read
Updated: Feb 20, 2024
Team RLNT< here with another update on the development of our Wheelchair Hill Assist Device. Throughout our last work period, major progress was made towards the device's production.
The team began the work period by finalizing the device's CAD file. Every critical component was re-measured to decrease the chance of having to reprint components. The locations of the wheelie bar attachment arms and widths of the wheelie bar extrusions were double-checked. Next, the team ordered the fasteners for the extended width (as discussed in the last blog post) and began to manufacture the device.
Since the team is 3D printing the device's shell and arms, the "slicer" for the 3D printer needed to be modified. Modifiers were placed around the contact point of the motor hub to the legs of the shell and around all bolt holes to have a 100% infill to increase strength. Other shell components were made to have 25% inlay with 3 wall layers to increase the ingress protection of the 3D-printed components.
In the last blog post Team RLNT< discussed the issue of where the team would be printing the device since the ASA filament releases toxic fumes. Team member Jakob Lee determined that he would be able to relocate his studies from his home office where the 3D printer is located for a couple of days. After resolving the print location issue, the team began test print one of the device's shell lid. The team reasoned it was best to print the device's shell's lid first since it is the smallest of all the components that the team needs to print.
Test Print One:
The first test print ended up failing due to warping, which caused overlaid print. This can be seen below in Figure 1. The edges of this print are not rounded flush due to the overlay that occurred. After this print failed, Team RLNT< consulted a 3D printing expert, Boon Jacobs, who regularly prints in ASA filament at his job. Boon concluded that the 3D printer build plate was inadequate because it was not specialized to print at a high temperature for long periods. Additionally, the texture on the current plate is not optimized for ASA. The team purchased the build plate that Boon recommended and it arrived on February 10th, prompting the team to commence test print number two.

Figure 1: Test print one of the device's shell lid that experienced overlay.
Test Print Two:
Test print #2 succeeded, but the print was low quality. The upper side of the shell had a coarse texture that the team suspected would be detrimental to the integrity of the shell. This texture can be seen below in Figure 2 around the outer edge of the lid. The team consulted with Boon again to try to figure out why this happened. He believed that the printer enclosure was losing too much heat causing the print to warp. He recommended buying foam insulation and building a thermal insulation barrier around the entire enclosure. The team then went to Home Depot and purchased a 4ft by 8ft foam insulation board. They cut the board and created a foam encasement to put around the 3D printer to reduce the amount of heat loss during the print. This thermal insulation layer can be seen below in Figure 3. Additionally, the Team researched the best print settings for ASA and changed the print settings according to the recommendations they found. After doing this, team RLNT< then commenced with test print #3 of the device's shell.

Figure 2: Test print two of the device's shell lid that printed with unexpected texture.

Figure 3: The foam insulation layer built around the team's 3D printer.
Test Print Three:
The print plate was placed incorrectly for test print three, but then after remedying this, test print #3 had to be canceled by the team due to low-quality layer adhesion caught by the 3D printer camera. This poor layer adhesion can be seen below in Figure 4, showcasing the inconsistencies in the geometric print pattern. The team changed more printer settings in an effort to increase the print quality and commenced test print four.
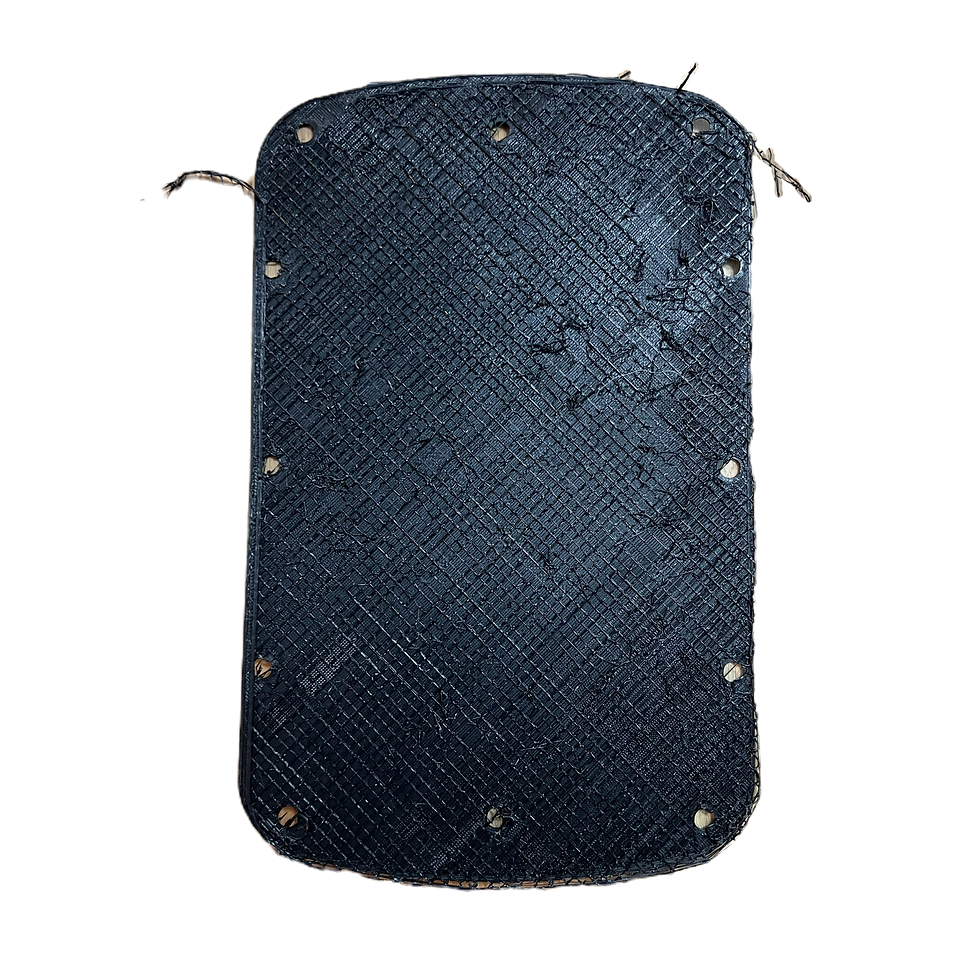
Figure 4: Test print three of the device's shell lid that printed with low-quality layer adhesion.
Test Print Four:
For test print number four, Jakob Lee walked into his office after the print finished to find both the front door of the foam enclosure and the 3D printer front door open. The 3D printer's magnetic fan head was completely off of the extruder and unplugged. The team is not sure how these abnormalities occurred. This print had a lot of overhang but the quality of the top layer of the shell was better this time. The visible offset between the lower layer and the top layer of the device's lid can be seen below in Figure 5. After replacing the fan to its correct position the team moved forward to try test print five.
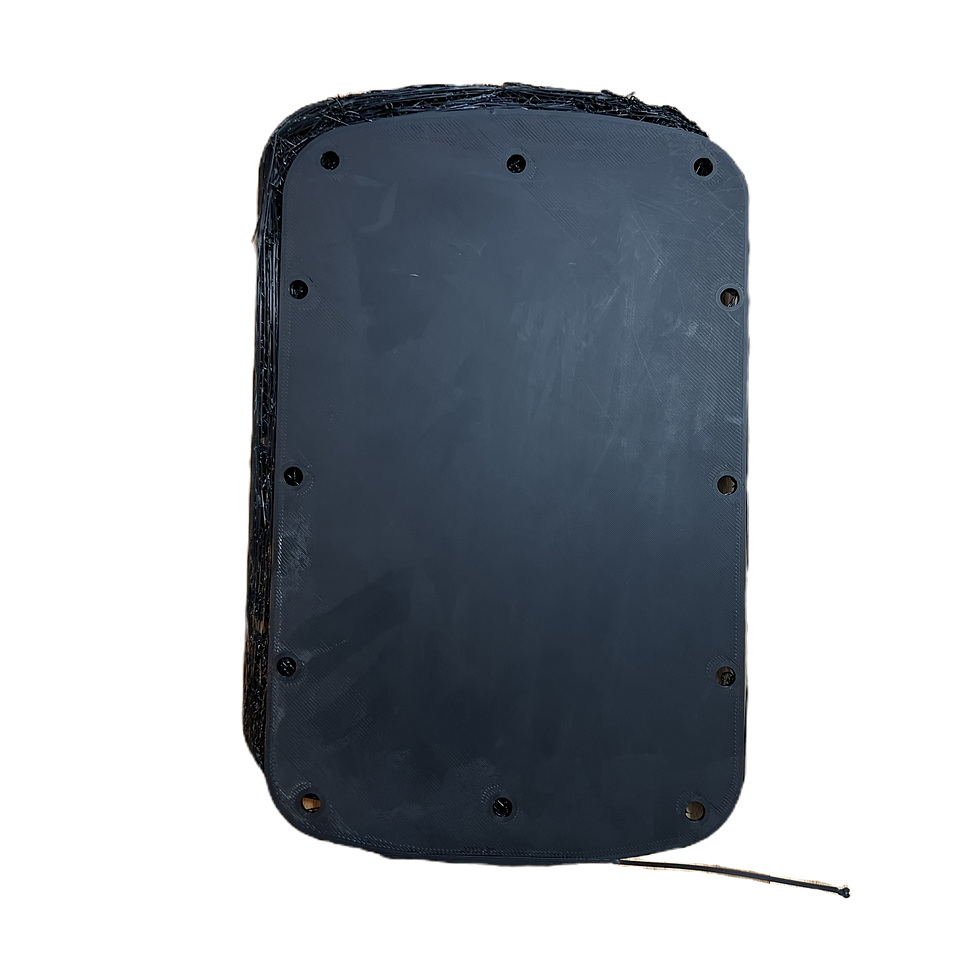
Figure 5: Test print four of the device's shell lid that printed with unknown printer issues.
Test Print Five:
This test print failed at 99% due to filament clogging. The print had abnormal wall layer consistency, which would hinder the device's ingress protection abilities. These inconsistent wall layers can be seen below in Figure 6 on the top half of the plate. Additionally, there was low inlay quality around the bolt inserts where modifiers should have been 100% inlay. No layer separation occurred on this print. The top layer looked "oddly" printed on this print because the printer printed it at a -1 distance from the top layer instead of the actual top layer location. After consulting the team's 3D printing expert, Boon, the team slowed the printer's acceleration, and the extruder temperature was increased 5 degrees to 170 degrees with the intent of that temperature change keeping it from clogging.

Figure 6: Test print five of the device's shell that printed with inconsistent wall layers.
Test Print Six:
The team canceled test print number six due to the exterior wall layer printing with low infill quality. In Figure 7 below, the poor infill can be seen around and in the bolt holes. Additionally, extra"strands" were printed which further indicated printing issues. After all of the issues Team RLNT< has experienced, we consulted with Boon and our capstone advisor, Dr. Chang, who suggested changing our filament to PLA instead of ASA. Team member Jakob has printed in PLA on his printer before and had no issues with it. The only con of using PLA instead of ASA is that PLA is not as UV resistant. The team decided to change the filament type to PLA.

Figure 7: Test print six of the device's shell lid that printed with poor infill quality.
Test Print Seven:
Team RLNT< ordered PLA filament and test print seven is underway. The print appears to be progressing without any issues.
For the next work period, the team will continue printing the device in PLA. The team hopes to have the entire device 3D printed before March 1st. Once the team has printed all the components, the team plans on fully assembling the device before March 9th. If the team can accomplish these two major milestones, then they will be able to move forward into the validation stage. Although the team switched filaments to PLA, the team still expects to encounter minor issues with 3D printing. The team will be watching each print closely to ensure nothing is malfunctioning. If repetitive issues arise with 3D printing PLA, the team will contact Boon Jacobs to print their device for them. While assembling the device the team will need to splice every controller wire because the plugs are larger than the diameter of the wire entrance holes on the shell. The team anticipates issues arising in doing so and will watch informative videos as well as consult their electronics industry professional, Les Hickman, before doing so.
As always, thank you for following along with the updates on the development of our Wheelchair Hill Assist Device!


Comments